Friday, July 29, 2011

Etsy Favorite Friday!: The House of Mouse

I had a thing about mice when I was a little girl (a good "Oh They're so cute!" thing, not a bad "Eeek!" scared of them thing). I loved mice. I loved movies and books about them. An American Tail was my favorite movie when I was 5. I even had a pet mouse for a little while that I named Fivel. I loved to draw mice. I used to draw a little mouse in the margin or at the top of all my school papers in elementary school. (with sad faces on the math paper mice...because I didn't like math!)

Well, this Etsy seller, TheHouseOfMouse, combines my childhood love of mice and my current love of the geeky (and British).


"The House of Mouse is a sister-act made up of two British sisters; Anna and Naomi. Anna founded The House of Mouse in 2007 and Naomi joined to make a partnership in 2010. Both Anna and Naomi sew and share the duties of this full-time business." (from their Etsy profile)


They don't only have geeky, British, pop culture mice though. Take a look at the shop and check out all the different kind of mice they make.

Tuesday, July 26, 2011

Monday, July 25, 2011

Make It Monday!: Button Stamps from Spools & Craft Foam

Awhile ago on the blog, I showed you the button stamp I made from an empty spool and craft foam. There's a link in the post to the tutorial that originally inspired me, but I've finally gotten around to taking photos for my own tutorial!


Materials:
  • Empty plastic spools (you could also use old prescription bottles)
  • Craft foam (the kid you find in the kids' craft section)
Tools:
  • Hot glue gun
  • Scissors
  • Hole punch
  • Marker, pen, or pencil
Use the spool you want to use to trace 4 circles onto the craft foam (I did 2 circles on blue and 2 circles on red.)

Cut circles out.

Take one circle and punch 4 holes in it to look like button holes (you can do 2 holes if you'd like).


Use the hot glue to glue one of the blank circles to the top of the spool. (You could also use chipboard if you'd like. It might even work better. The first circle is just a base to glue the other part to.

Glue on the "button" foam circle.


And there's the first stamp!

Take the second red circle and use a smaller spool to trace a circle.

Cut the circle out so you have a hole in the middle. The circle should now look like an "O".

Glue the blue foam circle onto the other side of the spool, then glue the "O" on top of it.

Remember when you used the hole punch earlier? Salvage those little foam dots from your hole punch. These will be the "button holes" for this side of the stamp.

Carefully glue the dots in the middle of the "O" to look like button holes. And now the second side is done!

One stamp...two designs!
Note: Be sure to clean your stamp off after using it!...especially if you plan on using the other side right away. Failure to do so will result in inked-up hands! I usually use cheap baby wipes from the dollar store.

I did a smaller one with a two-hole button design.

Happy Stamping! :)


Friday, July 22, 2011

Etsy Favorite Friday!: John W. Golden

My favorite items for this week are from the popular Etsy seller John W. Golden. He is known for his ability to reproduce traditional styles and methods digitally. He actually has his Lunastrella series in Target stores.


He's most popular for his"By Order of the Management" posters. I think I first saw them on Ohdeedoh. My favorite one is the "No Monsters Allowed" one (ironically enough!). There's also posters/prints that serve as friendly reminders for kids, such as...Brush Your Teeth, Wash Your Hands, Share Your Toys, Be Kind, Eat Your Vegetables, Keep It Down, and more!


I also like his Dog & Cat Series as well as his Critter Series. The black and tan dachshund is my favorite...since it looks like Luna!


I've had the song "Fireflies" by Owl City stuck in my head lately, reinforced by seeing them outside in the country fields at night lately. So I kind of like this print too. I actually was inspired by it and made a whole firefly treasury last week.

Thursday, July 21, 2011

Art Lesson with More Kids

I've recently taken on two more "students" for art lessons...my friend, April's 2 older children, Samuel and Ava. Eli, my regular student, wasn't able to make it this week. But it worked out alright, because I could get used to working with more than one child, which I was nervous about. It turns out that if I plan well, everything works out fine.

The kids did great for the first half of the lesson. They were very quiet and super-focused on their drawing. I think I planned too much though, since they started to get a bit antsy during the second half, when we were doing a "sight drawing" project. The other part of it is probably that sight drawing is hard...even for seasoned artists. And I'd given them some challenging pictures to work from.

Samuel's was probably okay, since it was already a cartoony line drawing (a freebie postcard I'd received from Happycloud Thunderhead). But Ava had chosen a photograph (one of my photos of vintage spools I bought from Etsy), which was more difficult for her than I'd realized. But she did a great job and stuck with it. They both did. I just think that next time I either need to end class earlier or give them simpler Sight Drawing subjects, like cartoons or line drawings.

I think they both did an awesome job though.


I often forget about how kids attention spans are. I forget that the wonderful experience of making art doesn't always capture their attention for as long as it does for me! Teaching kids is a challenge for me, since I have to scale back and try to remember how kids are. I have to walk that fine line between not patronizing them or making things too easy...and doing something too advanced and expecting too much of them. I want to challenge them, but not completely frustrate them. Well, frustration is part of the process, I suppose. But my #1 Art Class Rule is "No saying 'I can't'!" (or "it's too hard!"). I encourage them to replace "I can't!" with "Can you help me?"

I realized that with more kids and not being able to devote myself to a lot of one-on-one attention, I have to make class more structured instead of kind of go-with-the-flow like I have been doing with Eli. I have to actually have a structured lesson plan.

My Lesson Plan for this week:
  • Drawing Exercise (a worksheet I made from scans of a page in "Drawing With Children", with a series of very simple abstract drawings that the kids need to copy)
  • Sight Drawing (I give the kids a picture and they try to copy it)
  • Free Draw! (The kids draw whatever they want. It's their reward for being good during class.)
This week I even wrote class rules on my small whiteboard and went over them with the kids before class.

My Art Class Rules:
  • No saying "I can't!" (My #1 art class pet peeve. I want to teach them to try. And just because something takes a long time, it doesn't mean they "can't" do it or it's "too hard".)
  • Follow Instructions (as opposed to deciding to deviate from the instructions and do whatever they want)
  • Take Your Time (Now that there's more kids, I want to discourage the idea of racing each other to see who can be done first)
  • Work Quietly (kids can be chatterboxes!)
  • FOCUS! (When in art class, it's time to focus on art, not think about "Oh look! A bird!" or "I got a new Star Wars Lego set!")
We'll see how next week goes with all 3 kids...well...maybe 4 kids... since another one of my friends asked if her son can get in on this kids' art class action. But I think 4 will be my limit for now (who are all either 6 or 7 years old). I can only fit 4 kids at my dining room table anyway!

Friday, July 15, 2011

Etsy Favorite Friday!: Boy Wizard Pillow

The last few weeks I haven't done one, but Etsy Favorite Friday is back! And I decided that in honor of the last Harry potter movie coming out today, today's Etsy favorite item is the Boy Wizard Pillow from Etsy seller wdkimmy (aka: Pantoufle de Verre).

She has pillows for other Harry Potter characters: the Girl Wizard Pillow, Red Head Wizard Pillow, and Evil Boy Wizard Pillow. She also does various superhero, comic book, and fairy tale characters.

Wednesday, July 13, 2011

My Contribution to the RNEST Garbage Plate

So, many of you know I am a part of a local Etsy Street Team called RNEST (Rochester NY Etsy Street Team). There is a group project that has been around for over a year...the RNEST Garbage Plate. If you are a Rochester local, you should have at least heard of a Nick Tahou's Garbage Plate.

"A Garbage Plate is a combination of one selection of cheeseburger, hamburger, red hots, white hots, Italian sausage, chicken tender, fish (haddock), fried ham, grilled cheese, or eggs; and two sides of either home fries, French fries, baked beans, or macaroni salad. On top of that are the options of mustard and onions, ketchup, and Nick's proprietary hot sauce, a greasy sauce with spices and ground beef. It's served with rolls or Italian toast on the side,fresh from the bakery next door."

I don't see the appeal myself, but I'm one of those borderline OCD-ish people who doesn't like my food to touch! But many people in Rochester LOVE to eat garbage plates and there are copycats at many restaurants in the city and surrounding suburbs (they use a different name of course, since the term "Garbage Plate" has been trademarked by Nick Tahou's). My husband actually prefers the one at Henrietta Hots over the "original" Garbage Plate at Nick Tahou's.

Anyway...RNEST has a group project: making our own, handmade Garbage Plate. We pass the Plate around each month (or every few months in some cases!) and each member contributes something different to the plate using their own crafty medium. So far, there's the actual plate itself (by The Quilted House), a veggie burger ( by Duncan Creative), onion-y meat sauce (by Buenahelena), mac salad (by Jackbear Stamps), and hash browns (by Peaches Products)...and now it has a hot dog (by me, KiraArts)!

I brought it to the monthly meeting on Monday and everyone absolutely loved it! I had second thoughts about putting the monster face on it, but that's what everyone loved the most because, with that Nubbin face, you can tell it's from KiraArts! (otherwise, it's just a fleece hot dog!)

I got suggestions that I should make more of these, and other foods, since play-food is pretty hot in the handmade market lately.


Tuesday, July 12, 2011

Art Show: "Growth"

Tonight was the opening of "Growth - A collection of work by Lisa Barker & her friends" at The Owl House in Rochester.

It's an art show that a friend of mine organized and I contributed a piece to.


This is one of Lisa's pieces. My favorite one. I've talked about it before. I still want a print.


Some more of Lisa's work. (My photos don't do them any justice at all.)

The lovely Lisa!


It occurred to me tonight that this is the first time I've had a painting in a real art show! (school art shows don't count!) My piece is on the wall in the upstairs dining area. (the small, green painting in the middle). Any long-time blog readers may recognize it from a few years ago.

The central theme for the show was based upon growth and the idea of healing, and/or learning through and even rejoicing when things are hard. Quite an appropriate theme for this painting to be included in.

I may have posted photos of the painting before, and even mentioned that it, along with its companion piece, were born out of intense emotion, but I never gave the specifics. I don't often talk about our infertility. I try to stay positive here on the blog and don't want to be a "downer". I read something once on an infertility site that hit the nail on the head. It said telling people "we can't have children" is "one of the great conversation-stoppers of the world, about on a par with ‘I have cancer’ or ‘my mother was an axe-murderer’."

Yeah.

And everyone's first response is "Oh, I'm sorry." and then, inevitably, "Have you thought about adoption?" [sarcasm] no...the thought has never even crossed my mind![sarcasm]...here's your sign! No, really...I don't get snippy with people. I know they mean well, and...well...what else can they really say? I know they only say it because they don't know what else to say. So anyway, that's why I don't talk about it much. The bane of my existence is the dreaded question "So, do you have kids?" when meeting a person for the first time.

As for adoption...the answer is yes...but we are waiting for God to let us know when the time is right. And as for the whole "I knew someone who dealt with infertility, and after they adopted, they got pregnant!"...the way things are with our situation, us getting pregnant naturally would literally take a miracle. Which, of course, I still believe that God works miracles, but sometimes when you have the cold, hard facts, it's hard to keep that tiny spark of hope alive.

Whatever. We have accepted that God has had this happen for a reason. I have my good days and my bad days. Sometimes I'm fine with it all, and some days something will set me off (like baby showers or a friend's pregnancy announcement) and, usually combined with whacked-out hormones, will reduce me to a teary, moody mess.

Wow. I totally didn't mean to get all super-duper personal in this post, but there it is. I suppose if I am able to be this open publicly, I have had a lot of growth indeed.

Thursday, July 7, 2011

CJ's New TARDIS Shirt

CJ made himself a TARDIS T-shirt a few years ago using T-shirt iron-on transfer paper, but the design has since faded so much that you can barely recognize what the design is even supposed to be (I suspect it's partially my fault for not washing it correctly). Anyway, I had an idea to make him a new one for his birthday this year...one that wouldn't get ruined if it didn't get washed correctly. So I appliqued a simple, minimalist TARDIS design using T-shirt scraps!

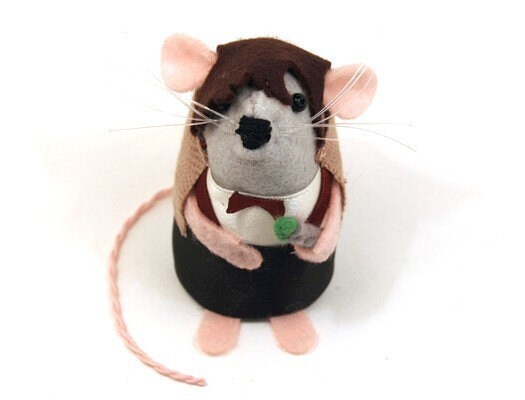
I met a kid at the craft show who loves Doctor Who too. It's such a niche kind of thing here in the States that people that like Doctor Who get all excited when we meet other people you like it too!...because most other people just think you're weird!

Red White & Blue Flower Pins

Inspired by the Flower Brooch I did as a custom order, I decided to make some festive, patriotic versions for the 4th of July show.

I just used the flower design from the 4th of July Hair Clips for this one, and added fabric leaves.


This brooch came about a little randomly. I had just happened to make a red, white, and blue flower, not originally intending on combining them into one piece. But the three flowers were lying next to each other in a pile, awaiting pins or clips to be glued on, and I realized that they would make a pretty, elegant, patriotic brooch if arranged together into one piece.

I thought both pins looked pretty with the brown dress I happened to be wearing on the day I made them.